The amount of work any garden takes depends on the design and the type of plants. If you’re too ambitious and try to do it all in one session, you risk feeling overwhelmed. Take it slowly, get to know the space and how it works.
This is how I turned an ugly barren verge into a lively and interesting nature strip that is far less work than grass.
Before you start, check your council’s policy and guidelines. You’ll find deeplinks to most in this directory of council verge garden policies.
- If you don’t have a street tree, contact your council and ask for one. It’s best if they come and plant the tree before you start gardening in that space.
- Start small. Choose an area of your verge – maybe the smallest part between the fence and the path, or an area around the street tree – and just do that bit to start with. Experiment and learn as you go. When you are ready, expand into the next part. (Mine is in four parts, divided by the footpath one way and driveway the other)
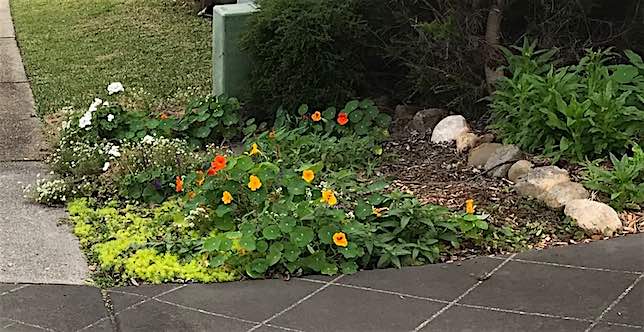
This is the first of the four areas I planted out – a small area marked by the property boundary (rocks), driveway, concrete footpath and neighbour’s verge. Note: The line of rocks is along the front edge of our property. Non-organic materials such as rocks, loose gravel, crushed brick or other stone aggregates are not permitted on the verges. - Remove the grass/weeds, preferably by hand, timing it a day or two after rain when it’s easy to work the soil. Loosening the top inch or two with a garden fork can help. You don’t need to dig deep or turn the soil.
- Plant small, cheap, hardy plants – cuttings from your garden or friends, tubestock from your local community nursery. You only need to make small holes large enough for each tiny plant. That saves digging and saves money. You also won’t mind so much if a cheap/free plant dies or gets trampled.
- Native plants are hardier and use less water. Once established, they’ll survive on rainfall. Your local community nursery is a great source of plants and advice.
- Long term, perennial plants and small shrubs are best. Annuals can be fun but they are more work. I tend to fill gaps with annuals while the long-term plants grow. Some annuals will self-seed and come up year after year. (Free plants!)
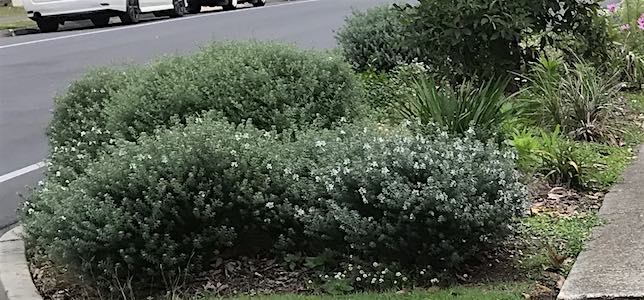
Westringia is a hardy, low-growing, native shrub that provides flowers and habitat for bees, small birds and other wildlife. Occasional pruning keeps them bushy and the trimmings can be left to add to the mulch layer. - Mix some soil improver (eg compost, Rocky Point’s ActivGrow or similar) in the holes as you plant. Water in with seaweed solution or similar. You’ll need to water regularly for a few weeks until they get established or more in very dry weather. Just using a watering can and spot watering can be easier than dragging the hose out.
- Don’t get too anxious about weeds – even with a few weeds, your nature strip will look better than a grassy/weedy barren verge. As you get to know the weeds, you’ll know which ones you need to pull out straight away and which you just have to get to before they flower. (And if you miss that, the weed seedlings can be green manure!)
- Woodchip mulch or similar can make easy paths to the letter box, or areas where passengers can get out of cars. You might have to top that up every year or so.
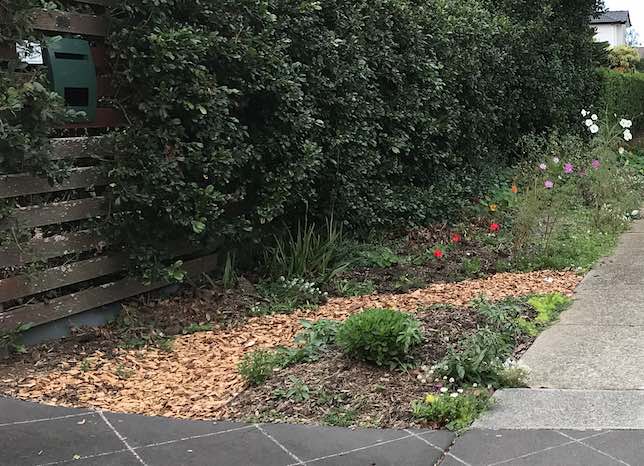
A clear path for the postie is essential. I watched to see where the bike wheels went on the grass to get the line for the path before doing this patch. - Your garden will evolve over time. The soil will gradually improve. The roots of plants, the worms, the various bugs, bees, butterflies and little birds are your unpaid helpers. Fallen leaves and plant trimmings provide mulch. You don’t need to clear them up.
See the list of plants on my verge here.